Understanding the Role of Finish Trim in Interior Design
Finish trim plays a pivotal role in defining the aesthetic and functional qualities of any interior space. It is often underestimated in the overall design process, yet it provides the final, polished look that transforms raw construction into a cohesive, stylish environment. Whether it’s baseboards, crown molding, door casings, or window trims, finish trim acts as the boundary that encapsulates your room’s features, offering a seamless transition between walls, floors, ceilings, and architectural elements.
When selecting and installing finish trim, homeowners and contractors alike should understand its importance in shaping the visual hierarchy, emphasizing room proportions, and enhancing architectural style. For those embarking on renovation or new construction, paying attention to the intricacies of finish trim is essential for achieving a professional, high-end result.
To explore how finish trim can elevate your space, visit Finish trim and discover tailored solutions that perfectly match your design goals.
What Is Finish Trim and Its Types
Finish trim refers to the decorative and functional moldings and moldings that complete the edges, corners, and transitions within interior spaces. It not only enhances visual appeal but also provides protection for walls and structures from damage over time. Finish trim comes in various types, each serving specific purposes:
- Baseboards: Installed along the bottom of walls to hide the gap between the wall and flooring, providing a clean transition and protecting walls from furniture and foot traffic.
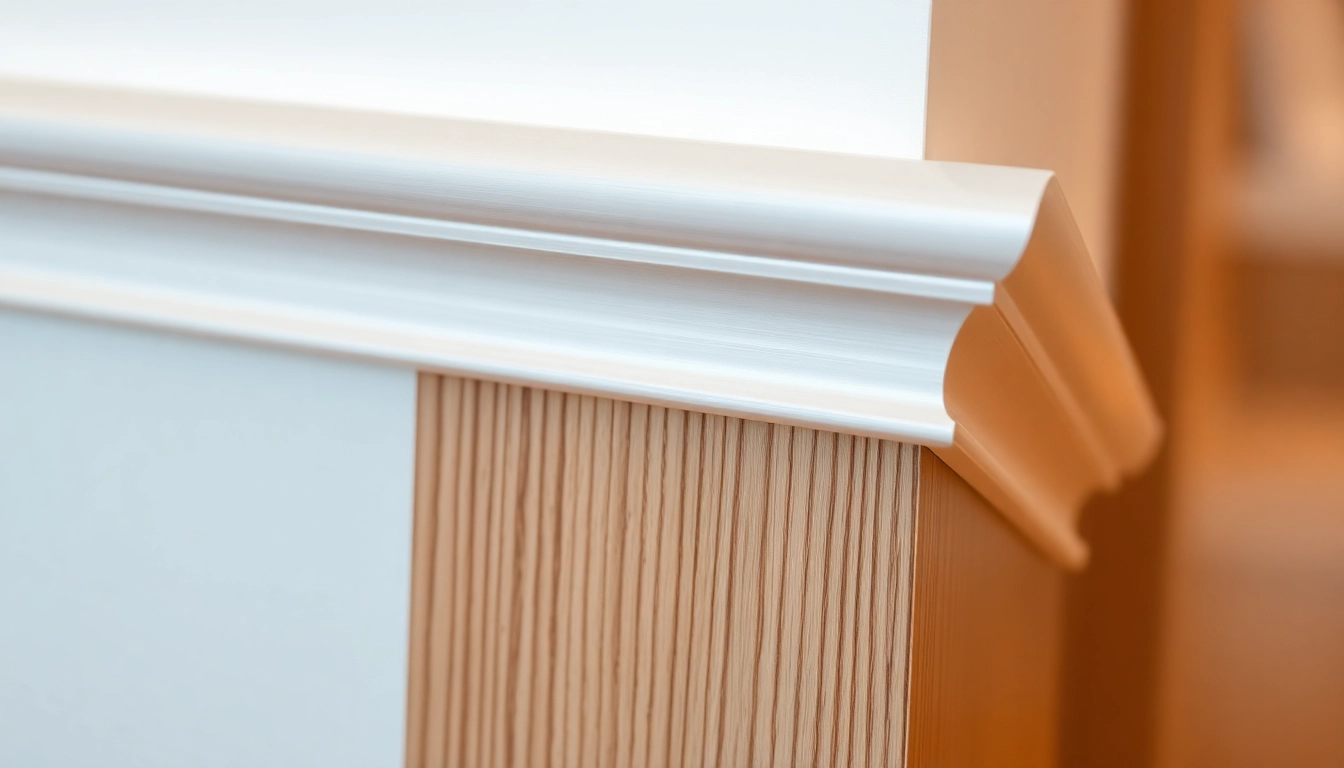
- Crown Molding: Located at the junction of walls and ceilings, crown molding adds elegance and dimension to a room, often used in traditional and modern interior designs.
- Door and Window Casings: Frame the opening of doors and windows, enhancing architectural detail and providing a finished appearance.
- Quarter Round and Shoe Molding: Small trims often used to cover gaps between baseboards and flooring, ensuring a seamless look.
- Other Decorative Moldings: Such as chair rails, picture rails, or intricate decorative trim that brings character and detail to specific areas.
Understanding each type’s purpose helps in selecting the right trim for your project, ensuring both aesthetic enhancement and structural integrity.
The Importance of Finish Trim for Aesthetic Appeal
Finish trim is more than just an afterthought; it is a fundamental element that delivers a finished, professional appearance. Well-chosen and properly installed trim can:
- Emphasize Architectural Style: Whether your home boasts a modern, traditional, or rustic aesthetic, selecting appropriate trim styles enhances the overall theme.
- Create Visual Balance: Properly scaled and proportioned trim complements room dimensions, preventing visual clutter or imbalance.
- Cover Gaps and Imperfections: Quality finish trim conceals imperfections or irregularities in construction, providing a smooth transition between surfaces.
- Add Character and Detail: Decorative trims can make a space look custom-designed and add layers of visual interest.
Skilled finish carpentry ensures these elements align seamlessly, making your interior visually appealing and highly functional.
Common Materials Used for Finish Trim
The selection of material significantly influences the durability, appearance, and cost of your finish trim. The most popular options include:
- Wood: Traditional and versatile, wood (such as oak, maple, or pine) offers warmth and authenticity. It is highly customizable through staining, painting, or finishing techniques.
- Medium Density Fiberboard (MDF): A cost-effective alternative to wood, MDF is smooth, easy to work with, and resists warping. It is ideal for painted finishes and intricate moldings.
- Polyurethane and Other Composites: Impact-resistant and water-resistant, these materials are suitable for areas prone to moisture, such as bathrooms or kitchens, and often feature intricate detailing.
- PVC and Vinyl: Commonly used in siding or outdoor applications but also available for interior trims, especially when moisture resistance is a priority.
Each material choice involves trade-offs concerning cost, appearance, ease of installation, and longevity. A balanced decision considers your design goals, budget, and specific application conditions.
2. Selecting the Right Finish Trim Style and Material
Matching Trim Styles to Your Home’s Architecture
Every architectural style has hallmark trim characteristics that complement its aesthetic. For example:
- Colonial and Traditional Homes: Feature elaborate crown molding, panel molding, and decorative casings, emphasizing symmetry and craftsmanship.
- Modern and Minimalist Designs: Often favor clean lines, flat casing profiles, and simple baseboards, focusing on sleek elegance.
- Rustic or Cottage Styles: Utilize wider, rougher wood finishes, beadboard, or reclaimed wood trim that adds warmth and texture.
Matching trim to your home’s style elevates its coherence, making the interiors look intentional and elegant.
Choosing the Best Wood or MDF for Durability and Look
When selecting materials, consider both aesthetic goals and functional longevity:
- Hardwood: Offers robustness and a premium appearance but comes at a higher cost. Ideal for visible, high-traffic areas.
- MDF: An excellent budget-friendly choice that paints well and holds intricate designs, but less resistant to moisture unless specially treated.
- Engineered Composites: Such as polyurethane trims, provide water resistance, making them suitable for humid environments.
Evaluate your environment, budget, and desired finish when choosing your trim material.
Color Coordination and Custom Finishes
The color and finishing techniques can dramatically influence how trim interacts with walls and other elements. Options include:
- Painted Finish: Classic and versatile, painting trim allows you to match or contrast with wall colors for desired effects.
- Stained Wood: Highlights natural grain, adding warmth and richness to traditional or rustic interiors.
- Custom Finishes: Faux finishes, gilding, or specialty stains can create unique styles tailored to specific design schemes.
Consistent color schemes and finishes unify the room’s aesthetic and can be customized to individual taste or thematic elements.
3. Techniques for Installing Finish Trim Like a Pro
Measuring and Cutting Accurate Angles
Precision begins with accurate measurement. Use high-quality tape measures and laser devices for exactness. When cutting trim, especially mitered corners or intricate joints, proper techniques are essential:
- Measure Twice, Cut Once: Always double-check measurements before cutting.
- Use a Miter Saw: Adjust angles carefully; standard angles for corners are typically 45°, but variations exist depending on wall geometry.
- Test with Scrap Material: Practice cuts on scrap pieces to verify fit before final cuts.
Accurate cuts ensure tight joints, reducing gaps and the need for extensive filling or sanding.
Proper Adhesives and Fasteners for a Secure Fit
Secure installation is critical for both appearance and durability. Techniques include:
- Nails or Finishing Nails: Commonly used for attaching trim, providing a secure hold with minimal visible holes.
- Construction Adhesive: Adds extra hold, especially for areas where nailing isn’t feasible or for attaching trim to uneven surfaces.
- Combination Approach: Use nails in conjunction with adhesive for maximum stability and professional finish.
Always countersink nails and fill holes with wood filler or caulk for a seamless look.
Achieving a Clean and Seamless Finish
The key to flawless trim installation lies in meticulous finishing touches:
- Use Caulk: Apply painter’s caulk along joints and nail holes to achieve a smooth appearance.
- Sanding: Lightly sand edges and joints after caulking for a flawless surface.
- Paint or Stain Carefully: Use quality brushes and rollers to apply even coats, avoiding drips or brush marks.
Patience and attention to detail during finishing ensure your trim looks pristine and professional.
4. Painting and Finishing Your Finish Trim
Choosing the Right Sheen and Paint for Trim
The selection of sheen and paint type significantly influences the durability and appearance of your finish trim:
- Sheen Options: Semi-gloss and high-gloss sheens are popular for trim because of their durability and ability to reflect light, making details stand out.
- Paint Types: Use high-quality latex or oil-based paints; latex tends to be easier to work with and clean, while oil-based offers superior hardness.
- Specialty Paints: Consider paints formulated specifically for trim, which resist scuffing and staining.
Selecting the right sheen and finish ensures your trim maintains its appeal over time.
Preparing the Surface for a Flawless Coat
Proper surface preparation is crucial for even coverage and professional results:
- Cleaning: Remove dust, dirt, and grease with a damp cloth and mild detergent.
- Sanding: Lightly sand the surface to smooth out imperfections and improve paint adhesion.
- Priming: Use a high-quality primer compatible with your paint to enhance coverage and adhesion, especially on MDF or stained wood.
Careful prep work results in a smooth, durable, and visually appealing finish.
Applying Paint or Stain for Long-Lasting Results
The finishing coats determine the longevity of your finish trim:
- Paint Application: Use quality brushes or rollers, applying thin, even coats. Allow adequate drying time between coats and lightly sand if necessary.
- Staining: Brush or wipe on stain, following the grain of the wood, and finish with a protective clear coat for durability.
- Protective Topcoats: Apply polyurethane or other sealants for increased resistance against scratches, moisture, and UV exposure.
Proper application ensures your finish trim looks pristine and withstands daily wear.
5. Maintenance and Enhancing Your Finish Trim’s Longevity
Regular Cleaning and Touch-Ups
Maintaining the beauty of your finish trim involves routine cleaning:
- Dusting: Regularly dust with a microfiber cloth to prevent buildup.
- Cleaning: Use a damp cloth with mild soap for more stubborn dirt; avoid harsh chemicals that can damage paint or finish.
- Touch-Ups: Repaint or reapply stain to areas showing wear, chips, or scratches to keep the trim looking fresh.
Addressing Common Damage or Wear
Over time, finish trim can suffer from impacts, moisture, or discoloration. Address these issues promptly:
- Sanding and Repainting: Lightly sand damaged spots, then repaint or re-stain for seamless repair.
- Replacing Damaged Sections: For significant damage, remove and replace sections with matching materials and finishes.
- Sealing and Protecting: Applying sealants or protective coatings can prevent future damage, especially in high-moisture areas.
Additional Tips for a Professional Look
- Invest in high-quality tools such as fine brushes, caulking guns, and miter saws.
- Take your time with measurement and cuts; precision is key.
- Use painter’s tape to ensure clean lines and prevent overspray or paint on adjacent surfaces.
- Follow a consistent style and finish across all trim elements for cohesive design.
- Consult professional carpenters or designers for complex projects or custom designs.